This is a thread from
Mod The Sims. It can be found
here.
Hello there! It has always been a tedious chore to convert any of my
clothes for teens, but after many trials, I've found a way to do so
without so many effort. It is not probably the only way to do it, but
this is my way to do it.
What you need:
-
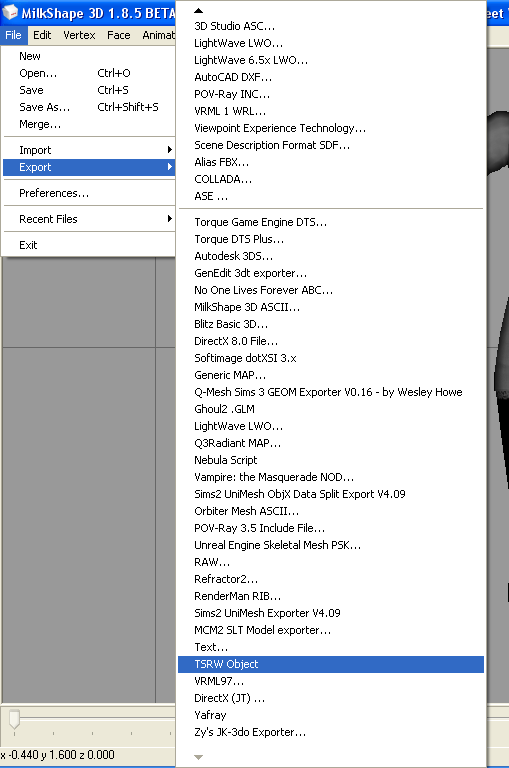
Milkshape 3D. I guess you can use other programs, like Blender, but I wrote this tuto for MS3D as it is the program I use.
-
Extended Manual Edit plugin by demon432.
-
TSR Workshop and .wso plugins
- Cmar's
Mesh Toolkit
- A medium knowledge of meshing tools (either Milkshape or Blender or any other program) and custom content creating.
What this tutorial WON'T teach you:
- How to use Milkshape3D
- How to make clothes
- How to work with meshes
- How to franken-mesh
- How to use TSR Workshop
- How to use Cmar's Mesh Toolkit
NOTE: In this tutorial I work with a mix of simgeom and wso
files. This is because wso files tend to get glitchy if you touch them
too much. I recommend to work around with simgeom's first, and export as
.wso files when you're finished.
Also, I'm working with a female body in this tutorial, but the technique also works for male teens.
So let's begin!
Step 1
Open Milkshape and import the adult body you want to convert. You don't
have to import the morphs, just the "base" mesh. Name it "group_base" if
you haven't already. Hide it.
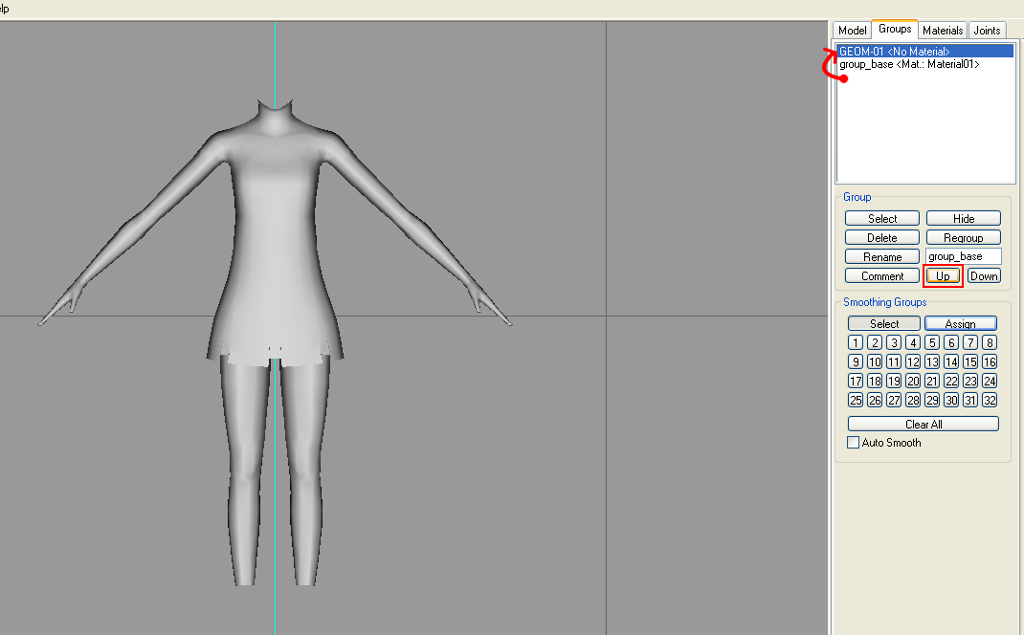
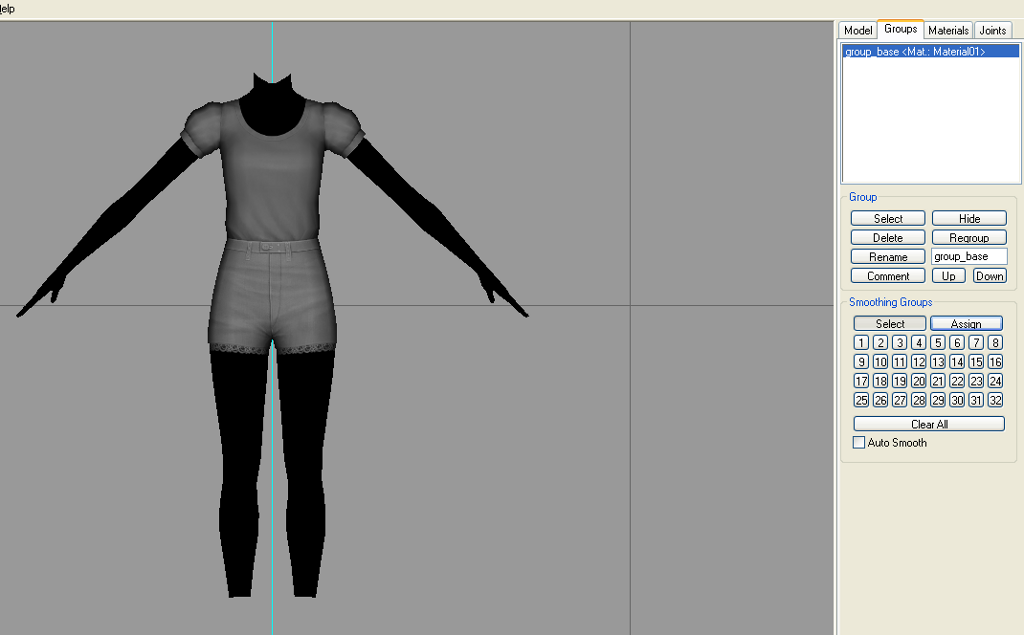 Step 2
Import any teen body you can use as base. In this case, I have used
tfBodyCheerleader (you can download it at the bottom of this tutorial)
Now, click on GEOM-01 like I've done, and press "Up" to move it above
youre base mesh. This is very important so don't miss it!
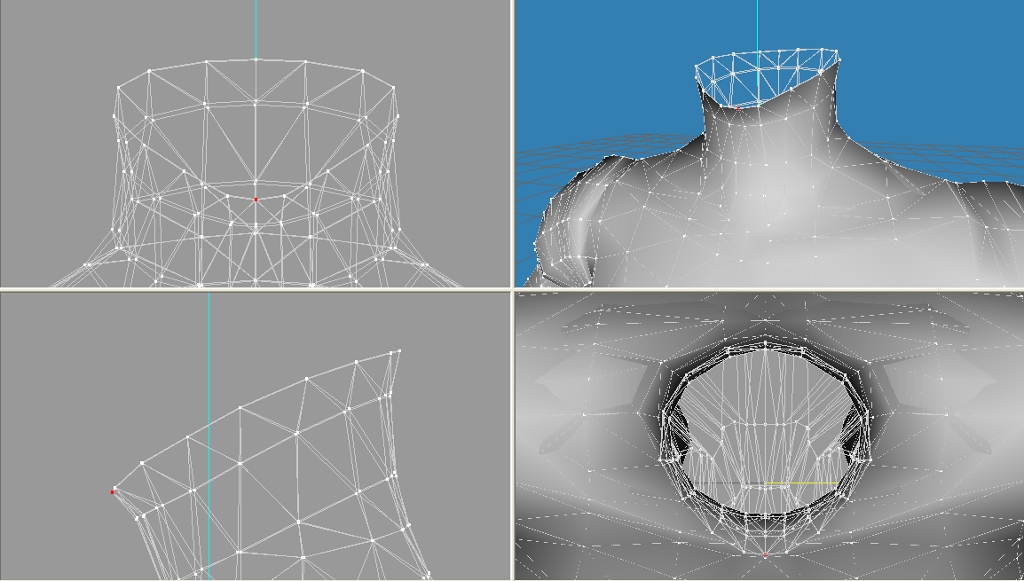
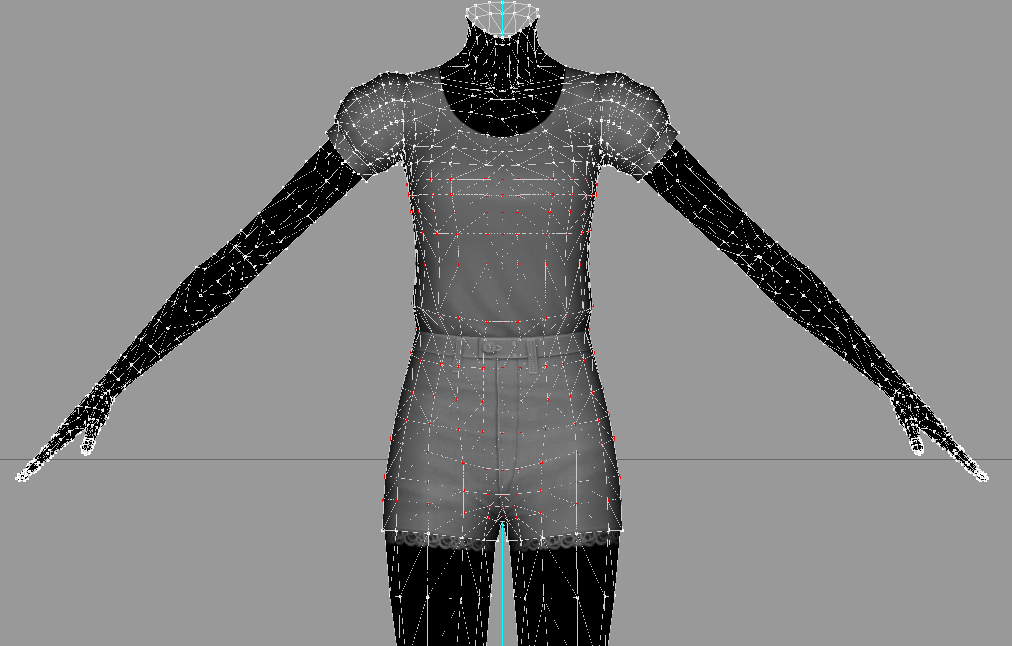
 Step 3
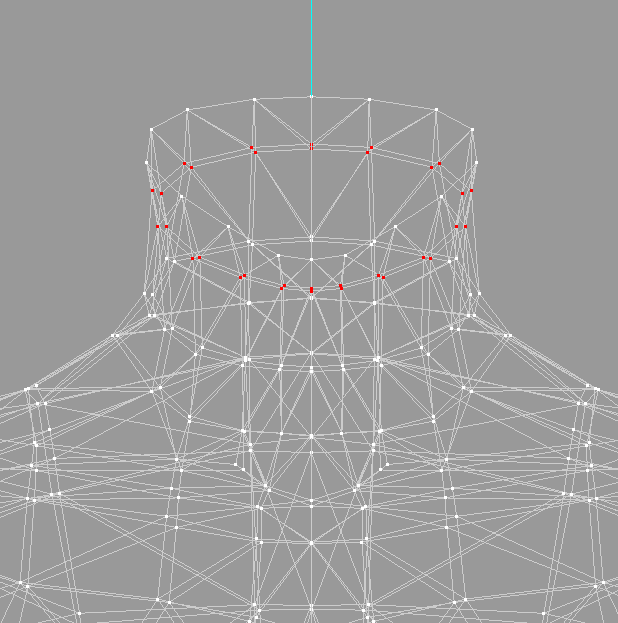
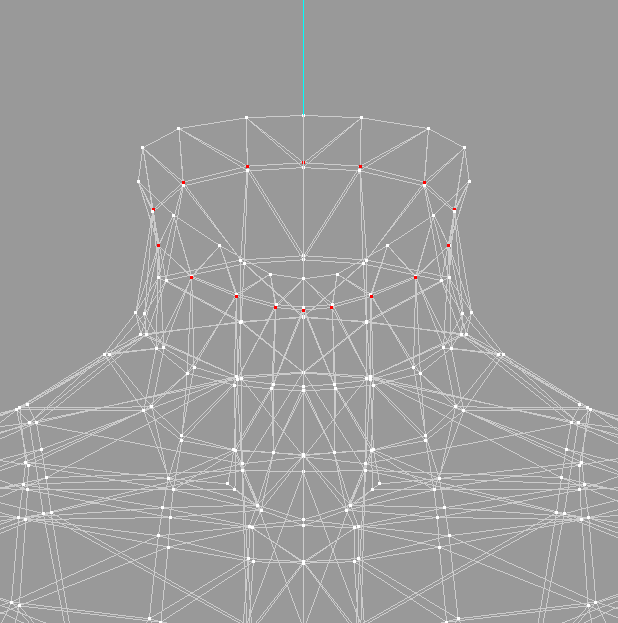
Select and zoom in to the neck seams. You'll see here that the vertices
don't match perfectly each other, and they don't have the same normals,
so we have to fix that or the head won't match with our neck.

To begin, select the same vertices from your base and the teen body, like in the following picture:
 Step 4
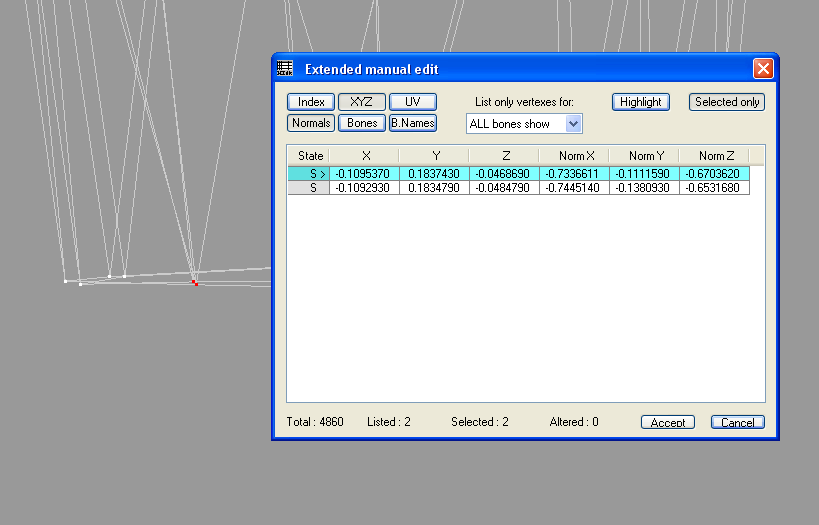
Now, go to "Vertex/Extended Manual Edit"
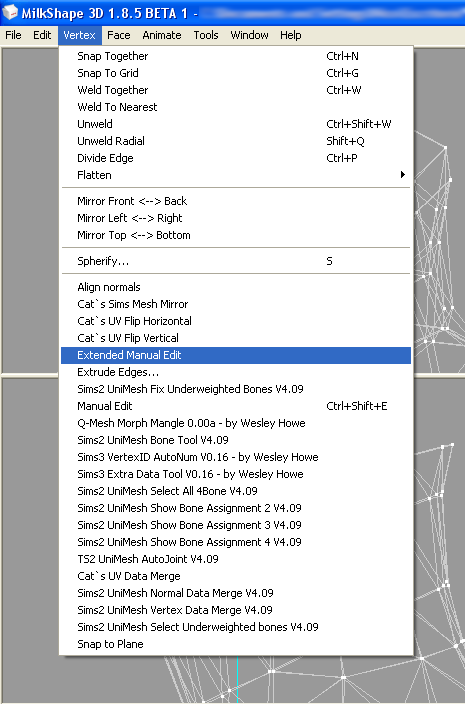
And the following window will open.
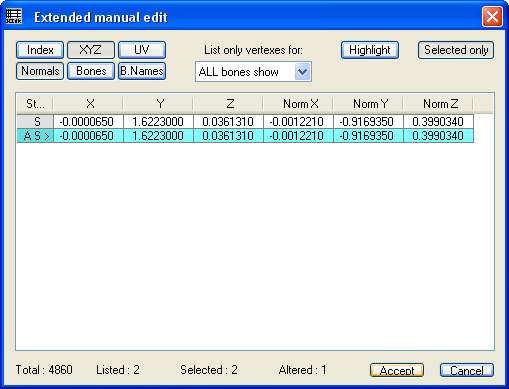
 Step 5
Make sure you have the "XYZ" and "Normals" button pressed down. Select
the first box under "X", and the number will autoselect. Press "CTRL+C"
to copy that number.
 Step 6
Now, click on the box below, and paste the number using "CTRL+V".
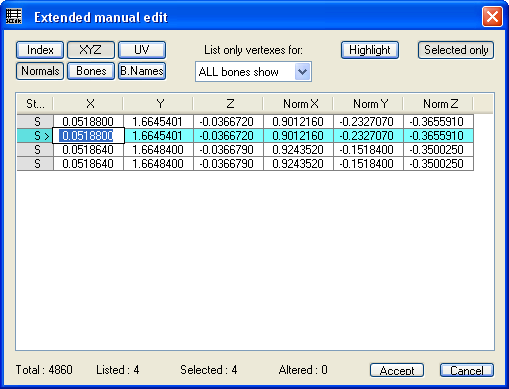
 Step 7
Repeat steps 5 and 6 with the rest of the columns, until you get something like this:
Once you're done, repeat the steps from 4 to 7 for the rest of the vertices.
 Note:
Note: You will see something like this eventually:
Don't worry! This means you have selected the seams vertices, where the
back and the front of the body joint and two vertices are in the exact
same place. The first two are the ones you have to copy for the bottom
two.
Step 8
You'll notice that the rest of the neck doesn't match too well either
You can use Extended Manual Edit, or just scale by X and Z to get it to
look alike, as it isn't really important if this matches perfectly.
 Step 9
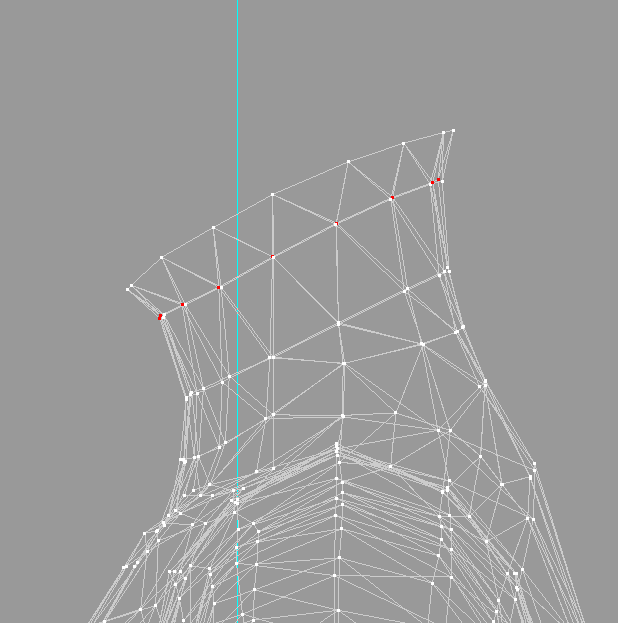
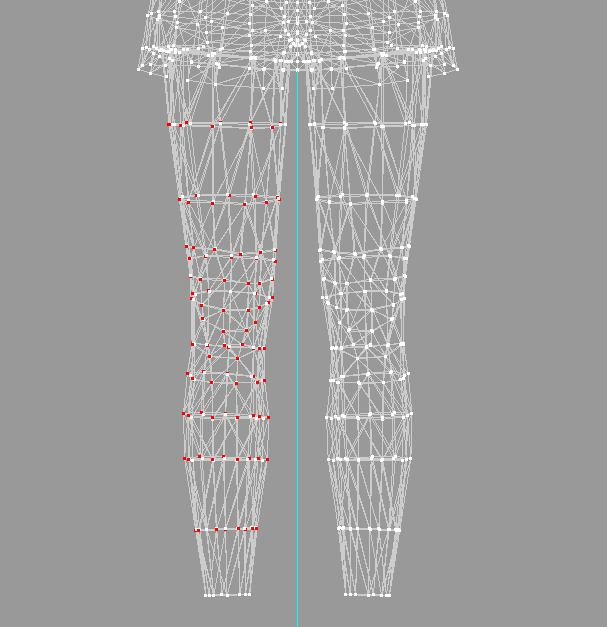
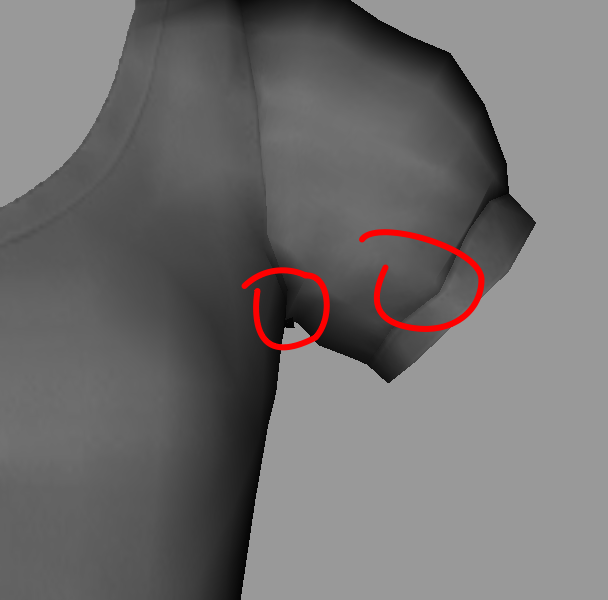
Another important thing to fix are the ankle seams.
Here, repeat the steps from 4 to 7 again, with both ankles.
 Step 10
You have already finished matching the most important things, but now
you have to make that adult body look more like the teen bodies from the
game.
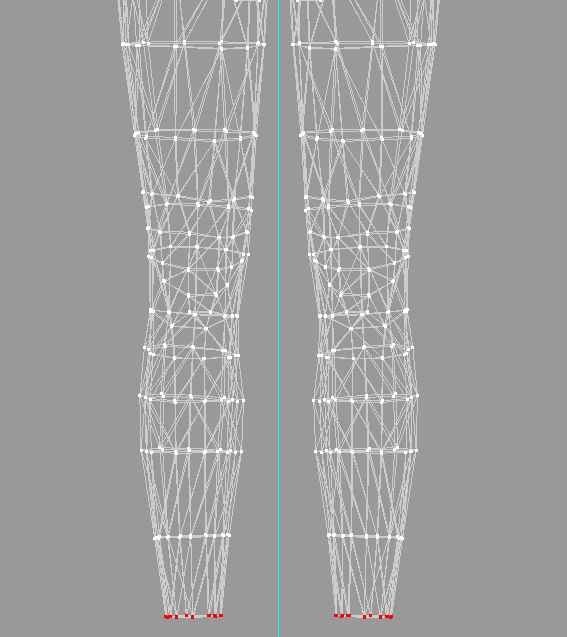
Starting with the legs, select one like in the picture below and scale
it by X and Z until it looks like the teen leg. Pretty much like in step
8.
 Note:
Note: You could also remove the adult legs and replace them with
teen legs, but that requires some franken mesh experience, and also
fixing the bone assignments, UV map and matching the legs with your
mesh. That's up to you!
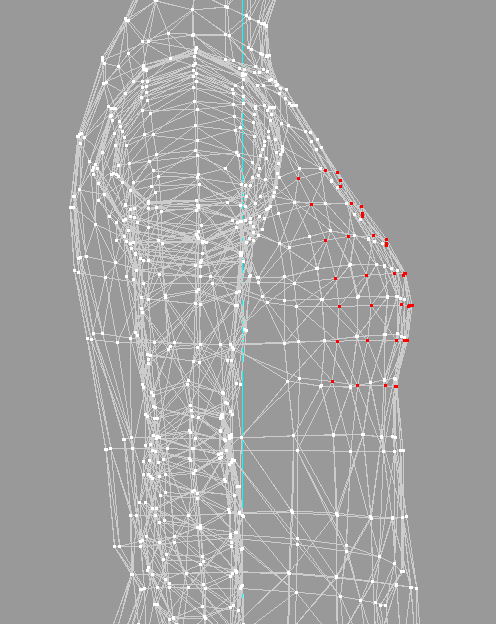
Now it's time to adjust the breasts. You'll notice that teens have smaller breasts.
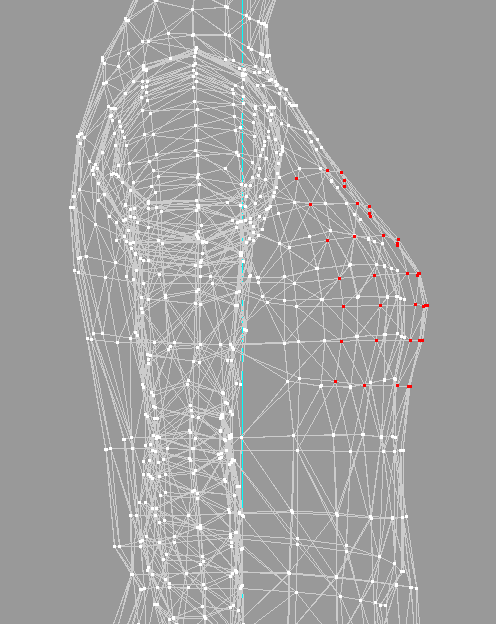
So scaling down by Z and then moving it backwards will do the trick.
Remember to fix the belly to match. Notice in my picture there is a
"lump" right below the selection that needs to be moved backwards as
well.
Teens don't have hourglass waists, so you must make them a tad wider. In
my case, the waist wasn't too thin, so it is not as noticeable as it
would be on a high waisted dress, for example.
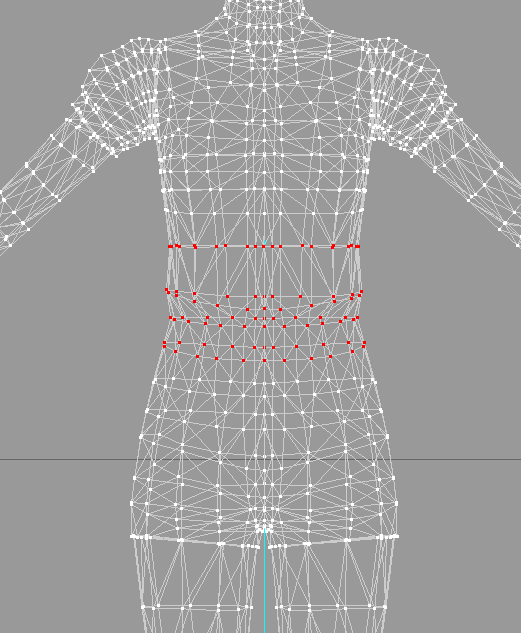
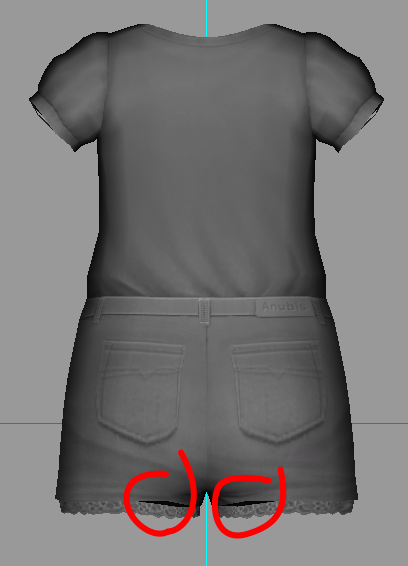
Last but not least, we have to make the whole body a little thinner. Do a
selection similar to the picture below and scale down a little by X.
Then unselect the first and last rows or vertices and scale down a
little bit more, to make it look harmonic. Also if you wish, you can
make their rear flatter.
We're done! So it's time to save and export as a .wso file with a name like "Body_teen"
 Step 11
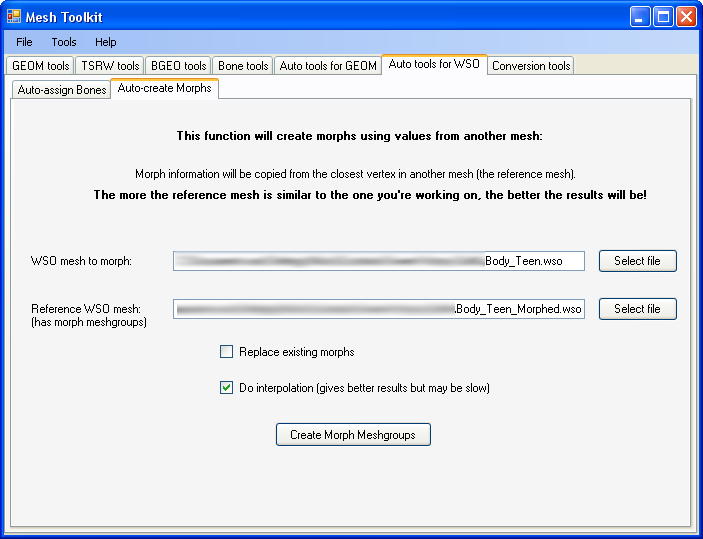
We're now off to create the morph states. Open Cmar's Mesh Toolkit and
go to "Auto tools for WSO" tab and then "Auto-create Morphs"
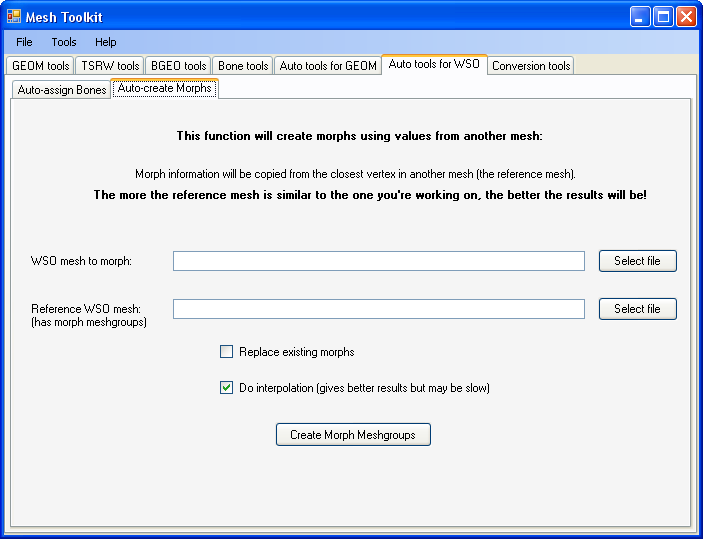
On "Wso mesh to morph" we'll select our "Body_teen" file using the
"Select file" option on the right. And on "Reference WSO mesh" we'll
select a .wso file of a teen body exported from TSR Workshop. I can't
tell you what file to choose, as you have to pick a body that looks like
the mesh you are converting. If you're converting a dress, then clone a
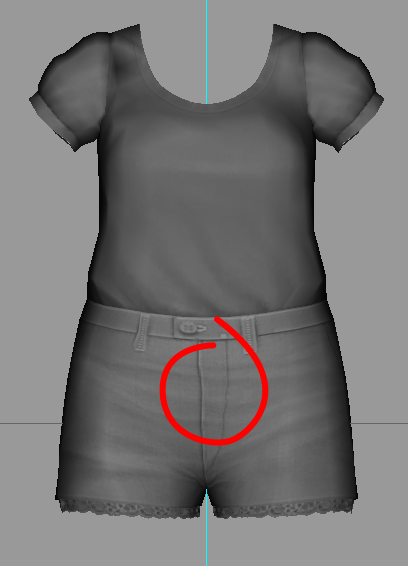
teen dress with TSRW and export the file to use it. In my case I'm
converting an outfit with tight shorts, so I'll be using the basic naked
teen body.

Now just press "Create Morph Meshgroups" and let the Mesh Toolkit do its magic! Save the file as "Body_teen_ MORPHED"
Step 12
Go back to Milkshape, start a new file and import your
"Body_teen_morphed" file. Delete the "group_special" group if you're
not using it, to save some space, as it is the pregnant morphs and teens
don't use it unless you use mods to get them pregnant.

We have to look around, because even though the Mesh Toolkit does a
great work, you'll find some iffy details specially on the fat and fit
morphs
Once you're done fixing those, export the file and override the
"Body_teen_morphed" you've created later. Or if you don't like doing
that, just re name it.
Step 13
Go back to the Mesh Toolkit, and on "Reference WSO mesh" select your
"Body_teen_morphed" file. Press "Create Morph Meshgroups" and save it as
"Body_teen_FINAL". I do this because, I've explained before, working
over .wso files is risky, so the best is to not to import touched .wso
files on TSRW.
 Step 14
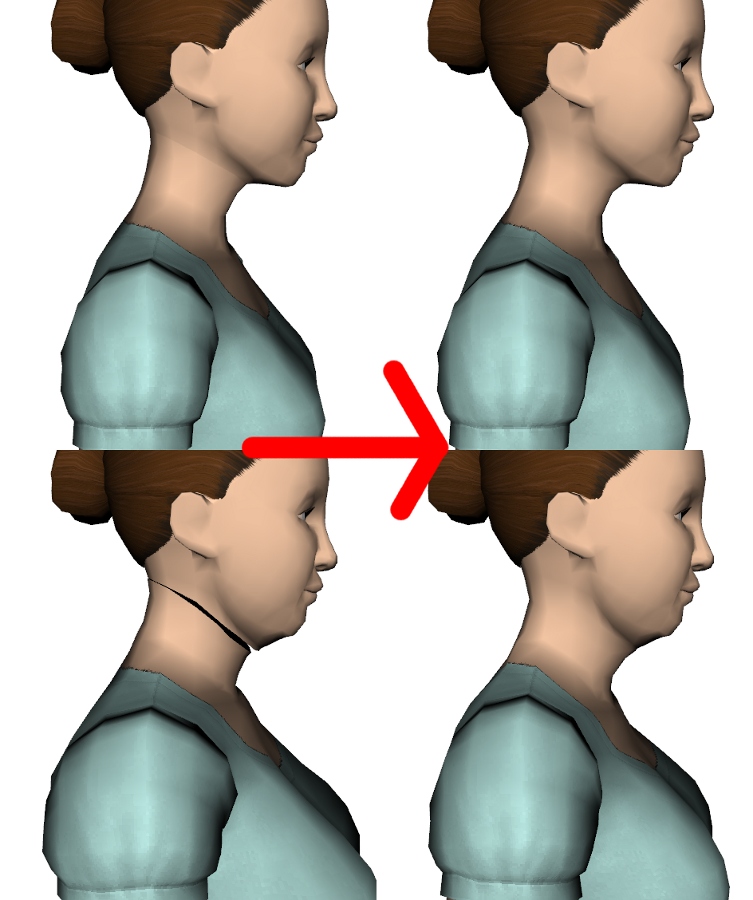
To finish, open TSRW and clone a teen body and import your new and shiny
converted mesh! Here you have a comparison of a teen using the adult
body and the teen body, to see how the seams and morphs don't match
correctly:
 Note:
Note: I use Extended Manual edit instead of Merge tools to match
the seams, because I like having control over everything so I don't miss
any detail. BUT if you want to learn how to use them (since it's
quickier) you can learn about them
here and aply those steps instead.
And the tutorial has finished! I hope you find it useful, and please
comment below if there's anything you don't understand, so I can help
you out or improve my tutorial